Structure Placement and Scenic Details
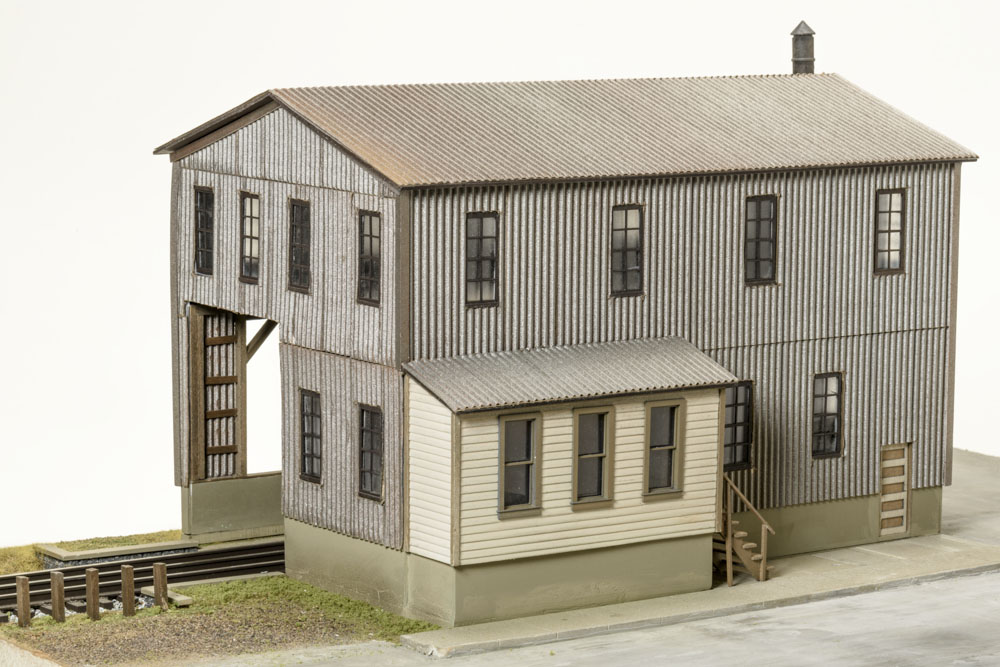
Using my prototype for the Oblong Box Co. kit, I’m going to show you how to integrate a rail side structure into your layout. Placement is important when you have rolling stock clearances to take into account, especially when a spur track actually enters a factory. I use the National Model Railroad Association (NMRA) Standard Clearances as a guide for locating the track relative to a loading platform—in this case our interior loading dock wall:
- From track center to edge of loading platform – 1 3/8”
- From top of rail to top of loading platform – 1”
Since the width of the track entry opening is 31/4, centering our track at 15/8 provides an extra margin of safety. The loading dock height is 1” above the bottom of the structure as is typical for most kits. If you wish to be prototypical, that means the top of the rail should be at ground level. We can do that by either raising the ground under the structure or physically lowering the track. On my layout, I often use ceiling tiles to cover the substrate. I used the same procedure on this diorama which will eventually be incorporated into my layout. It is often easier to do the immediate scenery and details at your workbench especially if the model is to be located in an area that’s not easily accessible.
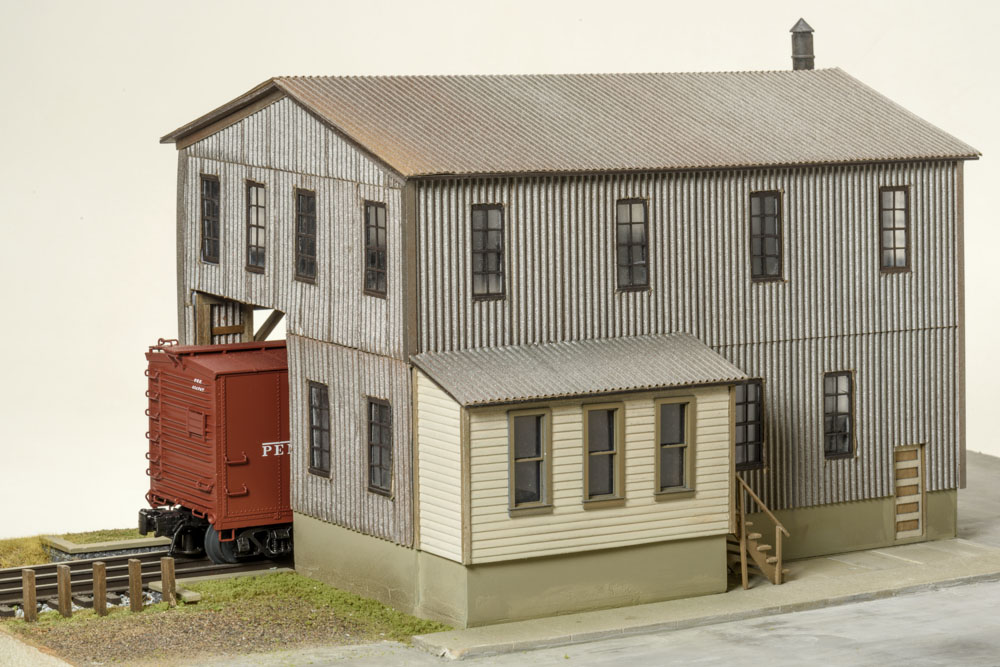 By cutting out a section in the ½” thick ceiling tile to accommodate the ½” high Atlas O track, I effectively placed the top of the rail at ground level. Additionally, this will provide enough clearance for a scale boxcar.
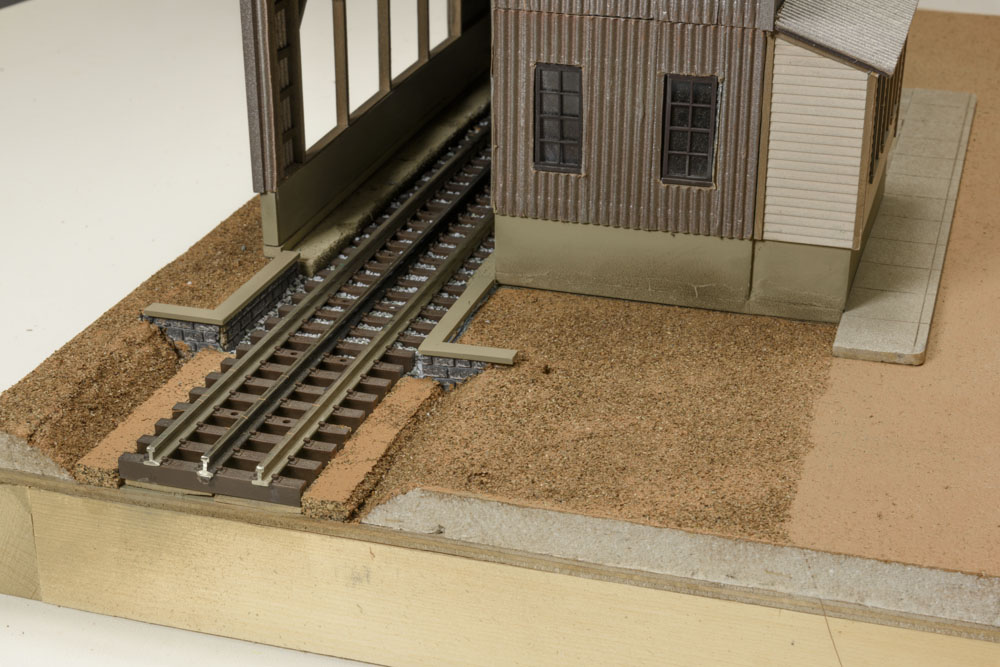
I mounted the building on a 1/8” scrap piece of Masonite to match the height of the sidewalk. Because of that, I also raised the track. Since, I didn’t have any more Masonite, I used paint stirrers. These were only 3/32” thick but that’s close enough. Actually, I could have left them out and nobody would ever notice.
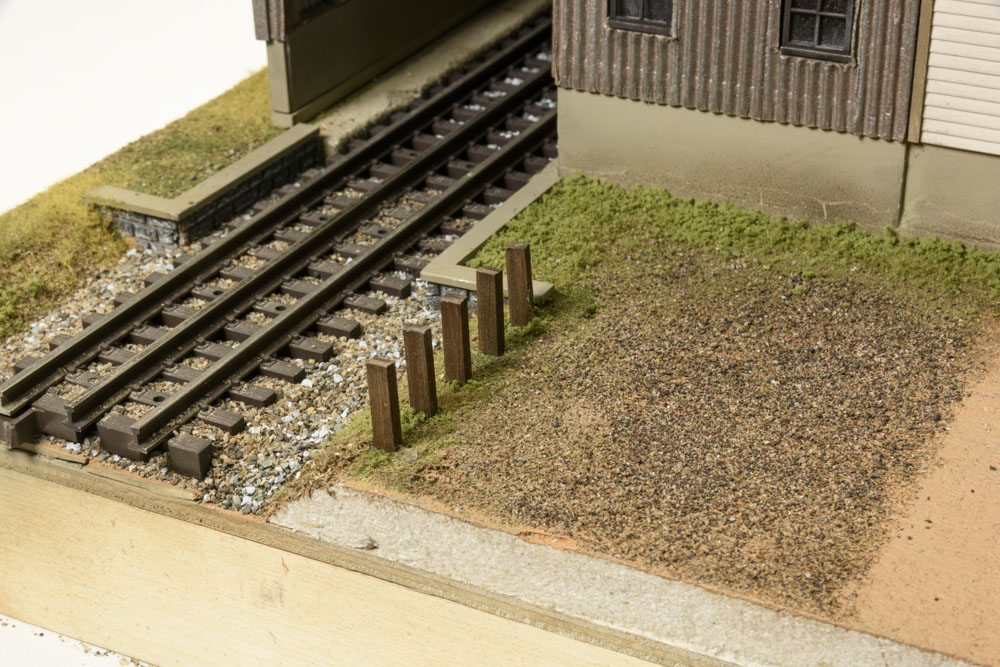
The retaining walls disguise the fact that the foundation stops at ground level. They also add a nice scenic element and serve as a contrast to the sloping ground. They are leftover scraps from another project and came from HO Decorflex foam retaining walls by Faller. Don’t let the HO tag fool you. These cut stones will fit right into an O scale layout. The cork strips alongside the ties were only being used as a placeholder and were eliminated.
Prior to adding ground cover materials, I painted the ceiling tile with a flat medium brown latex paint. This seals the tile and becomes the base dirt layer. A yardstick sidewalk was added next. Then, I added my Fine Natural Earth to provide a bit of texture to the dirt. Notice that I allowed the brown paint to show. The slope along the track sides was covered with both the Fine and Coarse Earth.
Next, I added Fine Superior Sand to represent that gritty texture one often encounters around industrial buildings. I see this as an employee parking area. The ties act as a guard rail. Woodland Scenics weeds and grasses add more color and texture. This also firmly sets the building into the ground by hiding the base. Finally, the street was paved with Durham’s Water Putty. Adding black liquid tempera paint to the water putty when mixing it, provides a nice medium gray color that is well suited for roads.
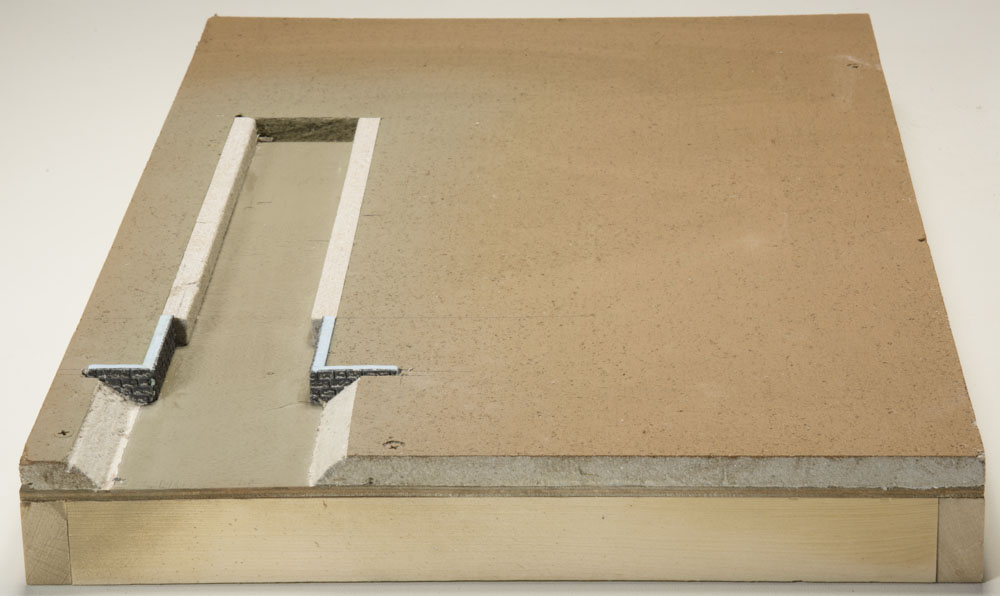 The diorama base is a 16” x 23 ½” piece of ¼” plywood supported with 1” x 2” framing. The ½” thick ceiling tile is placed bottom side up and then painted. I had initially made the cut out 3 ¼” to match the building opening. Then, I decided to match the track width instead, so I added the unpainted ceiling tile strips to abut the ties inside the structure.